Monday, December 14, 2020

Christmas in the Year 2020


In this year filled with anxiety and unbearable loss, I have doubled my Christmas efforts, partly to keep myself too busy to think about all the tragedy around me, partly to convince myself I can make it better.  Wishing you all joy and peace

my homage to blue and white


a real tree dripping with antique ornaments


Monday, December 18, 2017

A New Dining Room


One of the last downstairs projects was the dining room.  It began as this lovely salmon color and you can't see much of it, but there is a huge marble topped buffet on the right hand side--made of veneered plywood.   Yes, someone had a custom built buffet made for this elegant house and they used plywood.  It lives in the garage now, and is handy tool storage.


Now, it is my dining room, I think it is a marked improvement.  Green is not usually my color, but it turns out that the owners in the 1930s were friends of Grant Wood, and he picked the color for the crown molding and it hasn't been touched since then, so I left it and just erased the salmon and repainted all the woodwork with a brighter white.  My husband took out the 70s light fixture and put in a Victorian brass fixture.


Oh, wait, here is the view from the other doorway and you can kind of see the giant buffet.
Also note the weird restaurant kitchen type door that went out to the garage with the buffet.
Also weird, see strange dried husk things as wall art.


Here is the same view, done my way.


Kitchen Update


My kitchen has actually been done for over a year, but here I am posting the final sink picture way after the fact.

To review, I moved here and lived with this sad beige kitchen for 6 months.


Then I got to live with this disaster area for a few more months.


Here is the same view in my new world.  We had no contractors, mind you, just my husband as destruction guy, floor layer, and plumber; me as decorator and painter of all things--cupboards, walls, everything--with much help from my two daughters.


Here is a little closeup of the 1920s sink and the pretty view out my window, making doing the dishes a pleasant task.  That is correct, there is no dishwasher or microwave for that matter.  I was quite surprised to find that I need neither of those appliances.


Christmas at My House

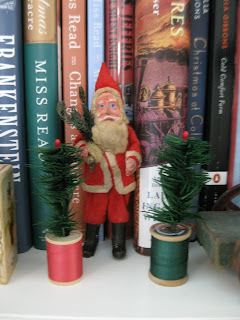
I lived in a little ranch house before we bought this house and Christmas decorating was a cramped affair.  There was no good place for a Christmas tree, so it had to be tall and skinny to stuff into the corner and even then we had to move tables or chairs to storage to make room for that.  I had to put all my regular little decorating things in boxes to make room for the Santas too.  Now that I have room again, I am out of control--I put two big trees in my living room and a smaller in the music room and even decked out little trees for the dining room and kitchen.  It is also so nice to just add my Santas to the shelves, room for everything!

Here is a little photo tour.  The first room off the front entry is the music room, where we have a kind of 1950s tree with big colored bulbs and antique reflectors.  My girls were rehearsing with the dog running around when I took this picture.  Anna ducked behind Grace just as I took it.


Back in the corner is an early corner cupboard that I repainted, and it is home to the Christmas farm every year.

this little vignette is also in the music room

Next room is my living room and here we put a tree with all white lights and blue and white ornaments in the window on one side of the room.

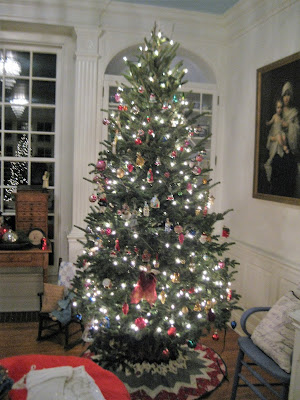
the other side of the room hosts a huge tree with all my favorite German glass ornaments, antiques and special gift ornaments from friends.

the bookshelves are so much fun to decorate.

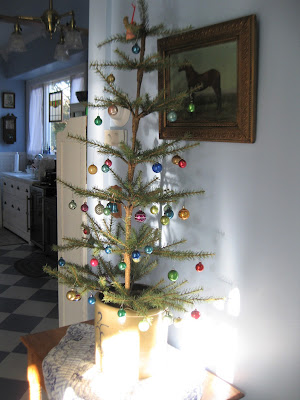
Next, we enter the dining room, where this little tree is my favorite of them all

I love it so much, I gave it a closeup.  All the ornaments are tiny little antique Shiny Brites.

I love these giant ornaments and wish I knew where to get more.

I love blue and white china, perfect for tiny trees.

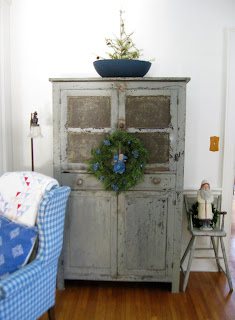
I put a tiny wreath on the big china cupboard.

I always love my antique horse, but he is especially festive this time of year.

One more little tree full of Shiny Brites is in the kitchen.

I have this bitty little sink over my real farmhouse sink, and it gets decorated too.

Mr Rabbit always gets a little holiday necklace.

Saltglaze snowmen hang out on the spice chest.


Wednesday, July 13, 2016

A Modern Kitchen Goes Back in Time and Gets Farmhouse Style

When we bought this house, I walked through the front entry into the worn-out yet elegant living room.  I oohed and aaahed at the beautiful paned windows and built-in bookcases and gorgeous carved woodwork and paneled mantel.  Next, I entered the dining room, which had a salmon and green color scheme problem, but still I was enchanted.  I was so excited to see what the kitchen would be--and was instantly crushed.  First of all, it was beige.  It was worse than beige--I have aptly renamed the color "Caramel Desert Sand Poo Paint".   The room also looked really small, especially after leaving the huge living and dining rooms.  The cupboards were unlike anything I have ever seen, and not in a good way.  I will show you the before picture, but it looks so much better in the picture than in real life, you will think I complain about nothing.  Here it is in all its former glory:


Let's be nice and talk about the good things first.  The big windows look out on the beautiful yard and are a wonderful focal point.  That is it for the good, I'm afraid.  The cupboards were plywood faced with linoleum.  Someone went to a lot of work to construct these and I wonder why not use real wood?  I think the counter tops were Corian, but isn't that supposed to be a no-stain wonder product?  It was quite stained and scratched and sad looking.  

What it that little door under the upper cabinets, you ask?  It was actually promoted as a selling feature of the house, "a unique recycling bin".  Open the door and you find a hole cut in the wall that leads into the garden shed.  There was a garbage bag rubber-banded over the hole to drop the recycling into.     It smelled.  It was a bad idea.  It lives no more.

We lived with the ugly kitchen for six months.  I must digress and tell you that I have long dreamed of having an unfitted kitchen comprised entirely of mismatched antique cupboards.  My husband, who usually trusts me, said no--he thought it would look weird and not good enough for the house.  Thus, I planned a normal kitchen remodel with new cabinets and quartz counter tops.  If we kept the bad footprint layout of the original cabinets and did all the work ourselves, the cost was over $35,000.  That price tag did not even include appliances.  I resigned myself to living with ugly kitchen.   I thought, "a little paint, a few flowers, some throw pillows..." (how much do I love Igor in Young Frankenstein?).  Fate intervened when we found a large cupboard in an antique shop and I mentioned that it was just what I had always wanted in the kitchen.  Once he saw the cupboard, my husband started warming to my original antique kitchen plan.  When we found all the cupboards we needed for about $6,000 total, he was even more enthusiastic.  Now that it has all come together, he finally admits I was right and he loves that we have a kitchen like no one else.

Now we go back in time to the destruction phase.  This lasted much longer than the television shows with contractors tell you.  It is much dirtier than you can ever imagine.  Dust encases everything you own even in far off rooms with doors closed.  It sucks.  Yet, this is the fourth time my husband and I have renovated a kitchen.  We are clearly mad.  This photo was taken in October 2015.  It is now July 2016 and there are still projects to finish in this kitchen, but scroll on and you will see some progress!

and this is how the back yard looked for a week:


The kitchen is now my blue heaven.  I think I can safely say it is one of a kind.  The cupboards were all in various states of disrepair when we found them.  We worked like the proverbial dogs to fix them and make them gorgeous.   I admit that in the beginning, I only had a vague idea of what we would do with everything, but it became the kitchen I have always wanted.  

First, I must tell you that the sink base is not done--it will be painted all white and the brass pulls will be replaced with cast iron.  We also need to put a shelf of some sort next to the sink--someday.  The sink, by the way is a 1920s salvage piece,  I plan to write a before and after about the sink and all of the cupboards later.


The floor is old fashioned 1950s style linoleum squares, they call it commercial tile now.  I didn't even know they made it still and was so excited when we found it at our small town lumber yard.
The low cupboard is an old seed cupboard from a store and has made quite the transformation--it was a mess when I first met it.  The lace etched window was one of those serendipitous finds, it fits perfectly in the big window that looked a bit too empty before.


This big two piece hutch started it all and it is the showpiece of the kitchen now.


This old Hoosier cupboard is a married piece--the base and top did not originally go together, but look like they were made for each other.


Here is the other side of the room.  Remember when I said I originally thought the room was small?  Well, it turns out when you take away the peninsula and the weird diagonal refrigerator cubby, the room is huge!   I love the train station clock we installed and the gorgeous Victorian brass light fixture (we replaced a pink 1930s fixture there that looked like it belonged in a bedroom).   The big paned window was originally the end of the house.  It looks into the dining room, which is the next room to be overhauled...I am so looking forward to saying good-bye to the salmon paint in there and bringing this old house a little closer to being a finished home.



Monday, May 30, 2016

Tutorial on How to Paint an Antique Cupboard with Chalk Paint

Today's post will teach you how to use chalk paint to transform an antique cupboard.  So easy, so peasy, you will wonder why you never tried this before.... ahem, but then again, maybe not.

Let us start with where to buy chalk paint.  You can be the trendy girl who spends too much because you know, EVERYONE uses Annie Sloan chalk paints.  Annie Sloan is to chalk paint as Louis Vuitton is to handbags, or so I am told.  It is crazy expensive and I am a tightwad, so I tried the bargain basement brands and they have worked very well.  On this cupboard, I used Decoart brand paint from Hobby Lobby, I have also tried the paint they sell at Menards and a home made version someone at an antique shop mixed up, they all worked great.

Next let us get real about how easy this is.  It is better than sanding and stripping off old finish before painting, but there is still a lot of work involved, so prepare yourself to be tired and dirty and know that you will need days to finish.

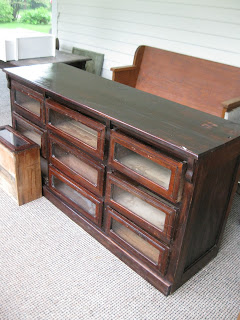
Here is my cupboard:


It is an antique seed cupboard from a general store, originally had wheat and corn and beans and other dried brown crap in the glass front drawers.  The varnish looks terrible, the drawers are all cracked and the entire cupboard is filthy.  It is wash-6-times-and-still-have-dirt-on-it-filthy.  This had to be remedied before I started painting.  So, one whole afternoon just washing the darn thing.

Now here is the good part, you can just start painting now.  You really do not need to remove finish or sand before you begin.


So, now I have spent quite some time putting on the first coat.  It still looks like crap.  Don't get panicky, Ethel.  (I Love Lucy in Off to Florida).  We still have two coats of paint to go.  I painted two coats, let dry overnight, sanded lightly and cleaned off the dust before putting on the third and final coat.  Sometimes the color of the old finish will bleed through the paint.  If that happens, put a coat of sealer on after the second coat of paint, then paint over the sealer for the third coat.  When the third coat is dry, sand the edges for a worn look.  I think you have to do this, if you leave it just painted it really doesn't look good.  Sanding the edges gives it a nice antique cottagey look that is beautiful.  One more cleaning, then time to seal.  I used Minwax Polycrylic in satin finish.  Are you ready to see the end product?


TA DA!  I put on new handles from the House of Antique Hardware and used dried white beans and split peas in the drawer fronts.  Coincidentally, this is the introduction to "Welcome to My Kitchen Remodel".  Oh, it has been a mess, but we will talk about that next time.