Wednesday, July 13, 2016

A Modern Kitchen Goes Back in Time and Gets Farmhouse Style

When we bought this house, I walked through the front entry into the worn-out yet elegant living room.  I oohed and aaahed at the beautiful paned windows and built-in bookcases and gorgeous carved woodwork and paneled mantel.  Next, I entered the dining room, which had a salmon and green color scheme problem, but still I was enchanted.  I was so excited to see what the kitchen would be--and was instantly crushed.  First of all, it was beige.  It was worse than beige--I have aptly renamed the color "Caramel Desert Sand Poo Paint".   The room also looked really small, especially after leaving the huge living and dining rooms.  The cupboards were unlike anything I have ever seen, and not in a good way.  I will show you the before picture, but it looks so much better in the picture than in real life, you will think I complain about nothing.  Here it is in all its former glory:


Let's be nice and talk about the good things first.  The big windows look out on the beautiful yard and are a wonderful focal point.  That is it for the good, I'm afraid.  The cupboards were plywood faced with linoleum.  Someone went to a lot of work to construct these and I wonder why not use real wood?  I think the counter tops were Corian, but isn't that supposed to be a no-stain wonder product?  It was quite stained and scratched and sad looking.  

What it that little door under the upper cabinets, you ask?  It was actually promoted as a selling feature of the house, "a unique recycling bin".  Open the door and you find a hole cut in the wall that leads into the garden shed.  There was a garbage bag rubber-banded over the hole to drop the recycling into.     It smelled.  It was a bad idea.  It lives no more.

We lived with the ugly kitchen for six months.  I must digress and tell you that I have long dreamed of having an unfitted kitchen comprised entirely of mismatched antique cupboards.  My husband, who usually trusts me, said no--he thought it would look weird and not good enough for the house.  Thus, I planned a normal kitchen remodel with new cabinets and quartz counter tops.  If we kept the bad footprint layout of the original cabinets and did all the work ourselves, the cost was over $35,000.  That price tag did not even include appliances.  I resigned myself to living with ugly kitchen.   I thought, "a little paint, a few flowers, some throw pillows..." (how much do I love Igor in Young Frankenstein?).  Fate intervened when we found a large cupboard in an antique shop and I mentioned that it was just what I had always wanted in the kitchen.  Once he saw the cupboard, my husband started warming to my original antique kitchen plan.  When we found all the cupboards we needed for about $6,000 total, he was even more enthusiastic.  Now that it has all come together, he finally admits I was right and he loves that we have a kitchen like no one else.

Now we go back in time to the destruction phase.  This lasted much longer than the television shows with contractors tell you.  It is much dirtier than you can ever imagine.  Dust encases everything you own even in far off rooms with doors closed.  It sucks.  Yet, this is the fourth time my husband and I have renovated a kitchen.  We are clearly mad.  This photo was taken in October 2015.  It is now July 2016 and there are still projects to finish in this kitchen, but scroll on and you will see some progress!

and this is how the back yard looked for a week:


The kitchen is now my blue heaven.  I think I can safely say it is one of a kind.  The cupboards were all in various states of disrepair when we found them.  We worked like the proverbial dogs to fix them and make them gorgeous.   I admit that in the beginning, I only had a vague idea of what we would do with everything, but it became the kitchen I have always wanted.  

First, I must tell you that the sink base is not done--it will be painted all white and the brass pulls will be replaced with cast iron.  We also need to put a shelf of some sort next to the sink--someday.  The sink, by the way is a 1920s salvage piece,  I plan to write a before and after about the sink and all of the cupboards later.


The floor is old fashioned 1950s style linoleum squares, they call it commercial tile now.  I didn't even know they made it still and was so excited when we found it at our small town lumber yard.
The low cupboard is an old seed cupboard from a store and has made quite the transformation--it was a mess when I first met it.  The lace etched window was one of those serendipitous finds, it fits perfectly in the big window that looked a bit too empty before.


This big two piece hutch started it all and it is the showpiece of the kitchen now.


This old Hoosier cupboard is a married piece--the base and top did not originally go together, but look like they were made for each other.


Here is the other side of the room.  Remember when I said I originally thought the room was small?  Well, it turns out when you take away the peninsula and the weird diagonal refrigerator cubby, the room is huge!   I love the train station clock we installed and the gorgeous Victorian brass light fixture (we replaced a pink 1930s fixture there that looked like it belonged in a bedroom).   The big paned window was originally the end of the house.  It looks into the dining room, which is the next room to be overhauled...I am so looking forward to saying good-bye to the salmon paint in there and bringing this old house a little closer to being a finished home.


Monday, May 30, 2016

Tutorial on How to Paint an Antique Cupboard with Chalk Paint

Today's post will teach you how to use chalk paint to transform an antique cupboard.  So easy, so peasy, you will wonder why you never tried this before.... ahem, but then again, maybe not.

Let us start with where to buy chalk paint.  You can be the trendy girl who spends too much because you know, EVERYONE uses Annie Sloan chalk paints.  Annie Sloan is to chalk paint as Louis Vuitton is to handbags, or so I am told.  It is crazy expensive and I am a tightwad, so I tried the bargain basement brands and they have worked very well.  On this cupboard, I used Decoart brand paint from Hobby Lobby, I have also tried the paint they sell at Menards and a home made version someone at an antique shop mixed up, they all worked great.

Next let us get real about how easy this is.  It is better than sanding and stripping off old finish before painting, but there is still a lot of work involved, so prepare yourself to be tired and dirty and know that you will need days to finish.

Here is my cupboard:


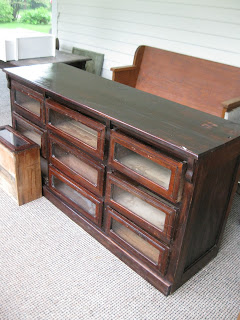
It is an antique seed cupboard from a general store, originally had wheat and corn and beans and other dried brown crap in the glass front drawers.  The varnish looks terrible, the drawers are all cracked and the entire cupboard is filthy.  It is wash-6-times-and-still-have-dirt-on-it-filthy.  This had to be remedied before I started painting.  So, one whole afternoon just washing the darn thing.

Now here is the good part, you can just start painting now.  You really do not need to remove finish or sand before you begin.


So, now I have spent quite some time putting on the first coat.  It still looks like crap.  Don't get panicky, Ethel.  (I Love Lucy in Off to Florida).  We still have two coats of paint to go.  I painted two coats, let dry overnight, sanded lightly and cleaned off the dust before putting on the third and final coat.  Sometimes the color of the old finish will bleed through the paint.  If that happens, put a coat of sealer on after the second coat of paint, then paint over the sealer for the third coat.  When the third coat is dry, sand the edges for a worn look.  I think you have to do this, if you leave it just painted it really doesn't look good.  Sanding the edges gives it a nice antique cottagey look that is beautiful.  One more cleaning, then time to seal.  I used Minwax Polycrylic in satin finish.  Are you ready to see the end product?


TA DA!  I put on new handles from the House of Antique Hardware and used dried white beans and split peas in the drawer fronts.  Coincidentally, this is the introduction to "Welcome to My Kitchen Remodel".  Oh, it has been a mess, but we will talk about that next time.


Sunday, May 29, 2016

Do You Need to Use the Facilities?

Here I show you the "quick" project in the house, the little powder room off the kitchen.  It was in pretty good shape, and was mostly cosmetic fixes.  My husband put in a new faucet and had to lie inside the tiny vanity to do the plumbing--that was when you would have heard bad words echoing through the house.  He also replaced the toilet with the Titan super flusher from Menards.  When we bought it, the clerk helping us load it into the car told us "You folks are really going to enjoy this."  Indeed we have.

Here we are in the time machine to look at the bathroom before, plain white with a very strange shell light cover which hung with a wire over a bare utility bulb.  This light is one of the many WTF? things that were in the house, especially the recently "remodeled" rooms.


It also smelled like mold, thus the Christmas soaps on the sink I was using to drown out the scent before we could fix it.

Back to the future, we are now beachy blue green.


I chose a nautical theme for this room, as you do.


This antique brass gaslight converted to electricity makes a big difference from sad shell light. The mirror is ship portal looking, because Why not?


Oh, and the mold smell is long gone, hoorah!

.

Tuesday, May 17, 2016

Shall We Have a Peek Inside the Cupboards?

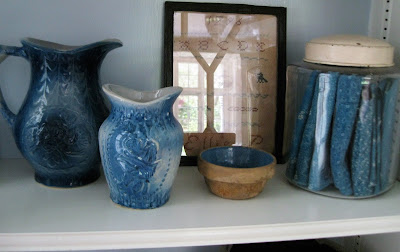
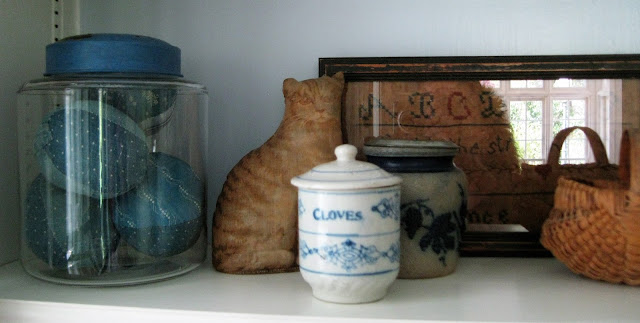
I have always loved blue and white, and have been purchasing bits of chipped china and old cracked crocks and just anything pretty for years in my role as Antique Dealer (note the capitals, it is my job title).   It turns out, I seem to be the only person in Iowa who likes odd pieces of blue china and cracked crocks, and I end up never being able to sell it.  Well, at last I have a place to put it.  The built-in cupboards in the living room are a dream come true for me.  It took hours of arranging and rearranging, but now I just sit and gaze at the cupboards when I need a break from the dust clouds of remodeling that still puff around me, it makes me happy.


just next to the cupboards is my antique garden statue, too pretty to let sit out in the rain and snow

Monday, May 9, 2016

Step In To The Great Room

I do refer to this room as my living room, but I just looked back at the old realtor's brochure when we bought the house and they called it the great room--fancy, schmancy.  They did that a lot in the brochure, such good marketers.

Restoring the living room was going to be a snap after the nightmare of removing dusty grass cloth from the music room.  Yes, I truly believed that.  After all, it only needed a new coat of paint.  Three months of working every day is what that "new coat of paint" took.  First, there were cracks in the wall--funny how we just didn't see them until we started the painting.  James got out the plaster and spent days fixing cracks and caulking the woodwork seams.  I cleaned up the dust mess and got out the paint.  All that gorgeous woodwork took two coats of paint and a coat of sealer at the end.  I thought I would NEVER finish.  At last I did, and very pretty it is.  Observe the before and afters:


This is when the former owners lived there, they liked modern stuff mixed with traditional.


Now, this is an Elaine room!  My husband replaced the tile around the fireplace and put in all new outlets, I painted and painted and painted...  Most favorite thing?  The blue ceiling, of course.  This is just half the room, turn around, we will look at the other side.


Once again, we have travelled back in time to the before.  The weird bird thing I just have no words for.


Here we are back in the present in my world.  I just love this room so much.  The minute I walked into it one year ago, I fell in love with the house, but truly thought there was not once chance in hell that I would ever actually own it, but everything just fell into place and I do!


Here is one more view of the room.  I've been collecting old oil paintings for years.  I used to be able to find them every where in antique shops and they were never very expensive.  I am so glad I took advantage at the time, they are much scarcer these days.  


Sunday, April 17, 2016

We Start in the Music Room

I can't believe it was almost one year ago that we started the remodeling of this house.  First order of business--we had to finish the music room before we moved out of the ranch house because the one item that we hired movers for was the baby grand piano.  That room had to be finished because we aren't moving that thing ourselves.

Here is the room before, when the former owners lived there--very out of Africa with the grass cloth wall paper and brass bamboo light switch covers.


My daughters and I spent one week of 8 hour days scraping off the grass:


We spent another week painting, the last day I think we worked until midnight, as the piano arrived the next day.  Here is the finished room, all Cinderella blue and white:


Turn the other way, and you look into the living room, which is a rather wonderful room, we'll see it next time.


Monday, March 28, 2016

Welcome to My Mess

My husband and I started our adventures in remodeling way back in 1980 just after we got married.  We bought an old farmhouse in the Middle of Nowhere, Iowa and started fixing the house with more enthusiasm than sense.  We made SO many mistakes, not all were our fault, but still...  The first problem was the one I have continued to face during the restoration of 3 more houses.  The problem  has always been that the materials readily available are all brown or gray or black or beige and I want BLUE!  Praise God for the invention of online shopping, I finally can buy what I want as we begin to restore Home Number 5  (so if you are counting, home 1 was the farmhouse, home 2 a little Victorian cottage, home 3 a Queen Anne Victorian, home 4 a brand new ranch house that still needed work and now this one).  Here she is from the outside:


The history of the house is that we are only the 4th family to live here since it was built in 1870.  The second family added on and remodeled in the late 1930s, the next family remodeled again in the 1970s and now here we are, doing it all over again.   The house is huge and not at all open concept--lots of little rooms.  I officially have 8 bedrooms and 5 bathrooms, and even a wine cellar and a maid's room.  It sounds so grand, doesn't it?  The reality is 8 little rooms upstairs with bad carpet, hideous paint, cracked window panes and lots of cobwebs.   As for the 5 bathrooms, well, we currently just have the door shut on 3 of them.  They are from the 1970s remodel and are just horrifyingly ugly.  The one we use is from the 1930s remodel and it actually is okay, just pretty worn out.   The one bathroom that I like is only a half bath downstairs--it is so small, it is one of the first things we fixed. The wine cellar is a little room with ugly wood shelves in the basement and the maid's room is an eensy room off the kitchen that I use for my craft room.

So far, we have finished the music room and living room and are in the middle of redoing the kitchen, back soon with posts on our progress.